Showing posts with label Tutorials. Show all posts

Saturday, November 27, 2010

How To Make Your Own Dyed Bottle Brush Trees and Other Holiday Decorations

 2shelves
              (Christmas 2009 photo)
Hi everyone! I hope you all had scrumptious Thanksgivings and everyone got along! We had a wonderful day (the weather was summer like). We had dessert on the porch! Of course this morning it was in the 20’s – that’s Georgia weather for ya.
tureenforrest
I’m decorating for Christmas this week (I’m not doing too much this year since I don’t want to have to pack up a lot of stuff) but I thought some of you might like to know how to make your own dyed bottle brush trees since it’s so easy and they’re so inexpensive compared to ones you can purchase.
pepperminttops
Plus you can customize them to your colors. I (of course) did mostly red, yellow and silver last year. These would be pretty in pink, blue, green etc!
Click here: How To Bleach and Dye Bottle Brush Trees
frontwreath
This is a really really easy wreath I made last year out of pom poms!
Click here: How To Make A Pom Pom Wreath
rickracktree
Here’s a red and white tree I made from felt along with some bottle brush trees.
Click here:How To Make A Felt Rosette Tree
topphoto
A yarn tree - which has got to be the easiest tree to make. All you do is get a cone (Dollar store/Michaels/etc) and wrap yarn around it until it’s totally covered. I added a pom pom to the top. You can also see a bit of a tree that I decoupaged with scrapbook paper.
buttontree
                  (A button tree & glitter snowball)
I was really into making trees last year! This year I’m making my some easy garlands.
joyhouses
Above are unfinished birdhouses from the Dollar Tree that I decopauged one year with Christmas scrapbook paper and some letters to spell “JOY”. Have a look through the Archives for more ideas. You can search by category or just look at November/December posts from previous years.

I’ll be back next week with some Christmas decorations and then I’m taking a break until January or so. I won't be working on any house projects during that time so I'll have more time to finally catch up with you all!

Thanks for dropping by today and have a wonderful weekend!


Thursday, October 14, 2010

Pumpkins In the Bookcase


Hi everyone! I’ve been selling my books on Amazon for the past month or so and the result is that I have lots of empty space on my bookshelves (and some extra fun money)!

I, of course, have to fill up all that empty space! Anyway, I wanted to make something that  I could put on one of the shelves that wasn’t scary or halloweeney (you won't find any halloween projects here) and came across a tutorial for a paperback book pumpkin @ Craftberry Bush. This is a new to me blog which seems to have lots of lovely craft ideas. So please do visit her and have a look.
paperpumpkin
It’s such an easy & inexpensive project and I think it’s the perfect type of pumpkin for a bookshelf -don’t you? That’s a real pumpkin stem on it by the way.
bottomshelf
On the bottom shelf I used a pumpkin I made last year. It’s a white one with black polka dots.


I just used those stick on dot things you get at the office supply store. They don’t come in black so I just went over them with a black sharpie. Then you just peel and stick them on the pumpkin. Easy, easy! Of course, you can do whatever color suits you – it’s a fantasy pumpkin so it doesn’t matter. Just coordinate it with your decor.
hydrangeas
Surrounded by a few other pumpkins and a little Pottery Barn vase I got at the thrift store
red&Yellowpumpkin
On the top shelf I put a red and yellow pumpkin that I got at some store last year – Hobby Lobby/Michaels – one of those. I like that pumpkins don’t have to be orange anymore – I keep those for decorating my front porch area.

Here’s how I made the paperback book pumpkin:

1. Take the cover off your paperback and draw the shape of your pumpkin on an appropriately sized piece of cardboard.
step2
2. Place your cardboard stencil on your book and use an exacto knife to cut around it. It’ll take several passes.
3
3. I did stain the edges of the pages with a tea bag as suggested in the Craftberry Bush tutorial.
4
4. I used a stem from one of my real pumpkins but the tutorial uses a stick (from your yard) hot glued to the spine of the book (with the top sticking up over the book).
step5
5.Then glue a few pages around the stick and hold the pages together with a clip. I glued a few of the back pages together and glued my stem on top.


6. I found that I did have to fuss with the pages a bit to get it fan out properly. I had to make the spine more flexible so that I could get it to fan all around.
paperpumpkin2
Although, my daughter says mine is more like a paperback pear than pumpkin! I guess I should have made it squatter :)

plates
Thanks for the kind comments and emails on my last post! I had been feeling a bit weepy about taking my plates out of the garden and all.

Also, saw the doctor yesterday and he said I can do 45 min of non/low impact aerobics 4 x's a week since my knee is doing so much better. So today I biked for 45 min and I feel so much better! When I don’t exercise regularly things bother me so much more than when I do exercise. So I’m glad I’m able to get back at it!

As always, thanks for stopping by!

Tuesday, September 28, 2010

Fall Book Page Wreath & Some Pumpkin Ideas


Hi everyone! I can’t believe it’s been a whole week since I last posted!!! Time flies when you’re busy. I’ll try to do an update post this weekend on what’s happening behind the scenes as they say :) 
fallwreath2
Anyway, would you like to see the fall book page wreath I made?

fallbookwreath
Book page wreaths have been around for quite some time and I’ve been wanting to make one. So I made one last night to relax and just work on something for fun for a change.

blackpumpkin
I also made a little pumpkin display using mostly pumpkins that I did years ago. I added some silver pumpkins this year which I just painted with an inexpensive bottle of silver metallic craft paint. The crown is a stick on decal. The design on the large white pumpkin is from a rub-on. 
fabricpumpkin
I bought two of these gingham fabric pumpkins at Target’s Dollar Spot (these are actually $2.50 each). I took off the raffia and changed the ribbon.
pumpkins
Again, some silver metallic craft paint (splattered these with a bit of black to make them look a bit more like aged mercury glass) another crown decal and more rub-ons.
allpumpkins
All the pumpkins.
wreath2
The wreath too.

I didn’t take photos of all the steps for making a book page wreath since there are already lots of tutorials available on how to make one. But to get you started, this is what I did:
Step1
I used a plate to draw a circle on some foam core (I got mine from my daughter who’s an art student but you can get it at Michael’s, Jo-Ann’s, Hobby Lobby etc). You could also use poster board or even a cereal box or cardboard. It’s going to be covered so it doesn’t really matter.
step 2
I then used a utility knife to cut it out. I tore out some pages from an old paperback that I had (that I never finished reading because I didn’t like it – but you can find one at a thriftstore or garage sale). I folded the pages in a sort of loose accordian fashion and stapled the ends.
step3
As you can see I drew another circle inside my form and I hot glued the folded pages around that circle and then continued with another circle inside that one and then another one inside that. Staggering the folded pages until the form was covered with pages.

coffeefilter rosettes
In the center I hot glued a flat coffee filter and in the center of that I glued a pinecone (a pumpkin would be cute too) and surrounded it with coffee filter rosettes. I hot glued some faux falls leaves in various places and some ribbon on the back so I could hang it.

wreath3
It’s really an easy project and cost me nothing since I had everything required already. It was a fun project for me. The center had me stumped and I tried various things until I decided on the pinecone with the rosettes.

Thanks so much for sticking with me during this busy season I'm in. I only give myself 30 min. in the morning to visit blogs so if you haven't heard from me in a while - that's why. Well...back to stripping wallpaper (oh fun)!

Thanks for dropping by!

Friday, July 30, 2010

Tutorials Revisted


Hi everyone! I thought I’d re-post a few tutorials that I’ve done in the past. I’ve been getting x-rays and a MRI etc done on my knees (which I re-injured running a few months ago) this week and just haven’t had the time or energy to take any new photos. I'm more exhuasted from waiting to see the various doctors than anything else!

How To Make a Teacup Birdfeeder
birdfeeder
Here’s what you need:
supplies
You need a teacup (of course), a 1/2 inch piece of copper pipe, a 1/2 in. copper cap that will sit on top of the pipe, some strong waterproof glue. I read one direction on the internet where they said use hot glue....I don't know if that will hold in wet weather. I made one last year that fell off it's wooden post because I used the wrong glue. So use Bondo, E6000 or a similar type glue.
step1
Then glue your saucer onto your cup and then glue your cap onto the saucer (with the opening up)and let that sit for several hours to dry. Then you just slip the whole thing onto your copper pipe which should already be in the ground. The good thing is you can easily take the teacup part off to dump the water that will collect when it rains. I'm not really going to put birdfeed in mine but you can!
plateborder
Stamped Plate Project
plate1
Take any stamp that you like, Archival Ink in the color of your choice (which I get at Hobby Lobby but I’m sure any craft store would carry it).
plate2
Load your stamp with ink and center your stamp. Press nice and hard. Lift off without too much movement so you don’t smear the design.
stampedplate 005
Easy peasy! This is for decorative purposes only. I have rinsed it but I would not recommend scrubbing it. I made this in 2008 and still have it!

Chalkboad Paint Label
You can use chalkboard paint on just about anything! I added chalkboard paint labels to some glass jars in my pantry by taping off the area.
chalkboardpain3
Paint inside the taped area with chalkboard paint. It may take more than one coat.
Chalkboardlabel
After it’s dry, prime it by covering it with some chalk, wipe off residue and now it’s ready to write on!
Charlkboardlabel2
This makes the jars very versatile and it works on cups, plates, those old silver platers you can find every where etc!

hyacinths

Friday, June 11, 2010

Painted Books & A Mantelscape


Hi everyone! Hope you’ve had a good week so far. Thank you for all the kind comments about my new fruit garden – I’m a farmgirl at heart and I work with what I’ve got which is a suburban lot. But I’d rather have some acreage!

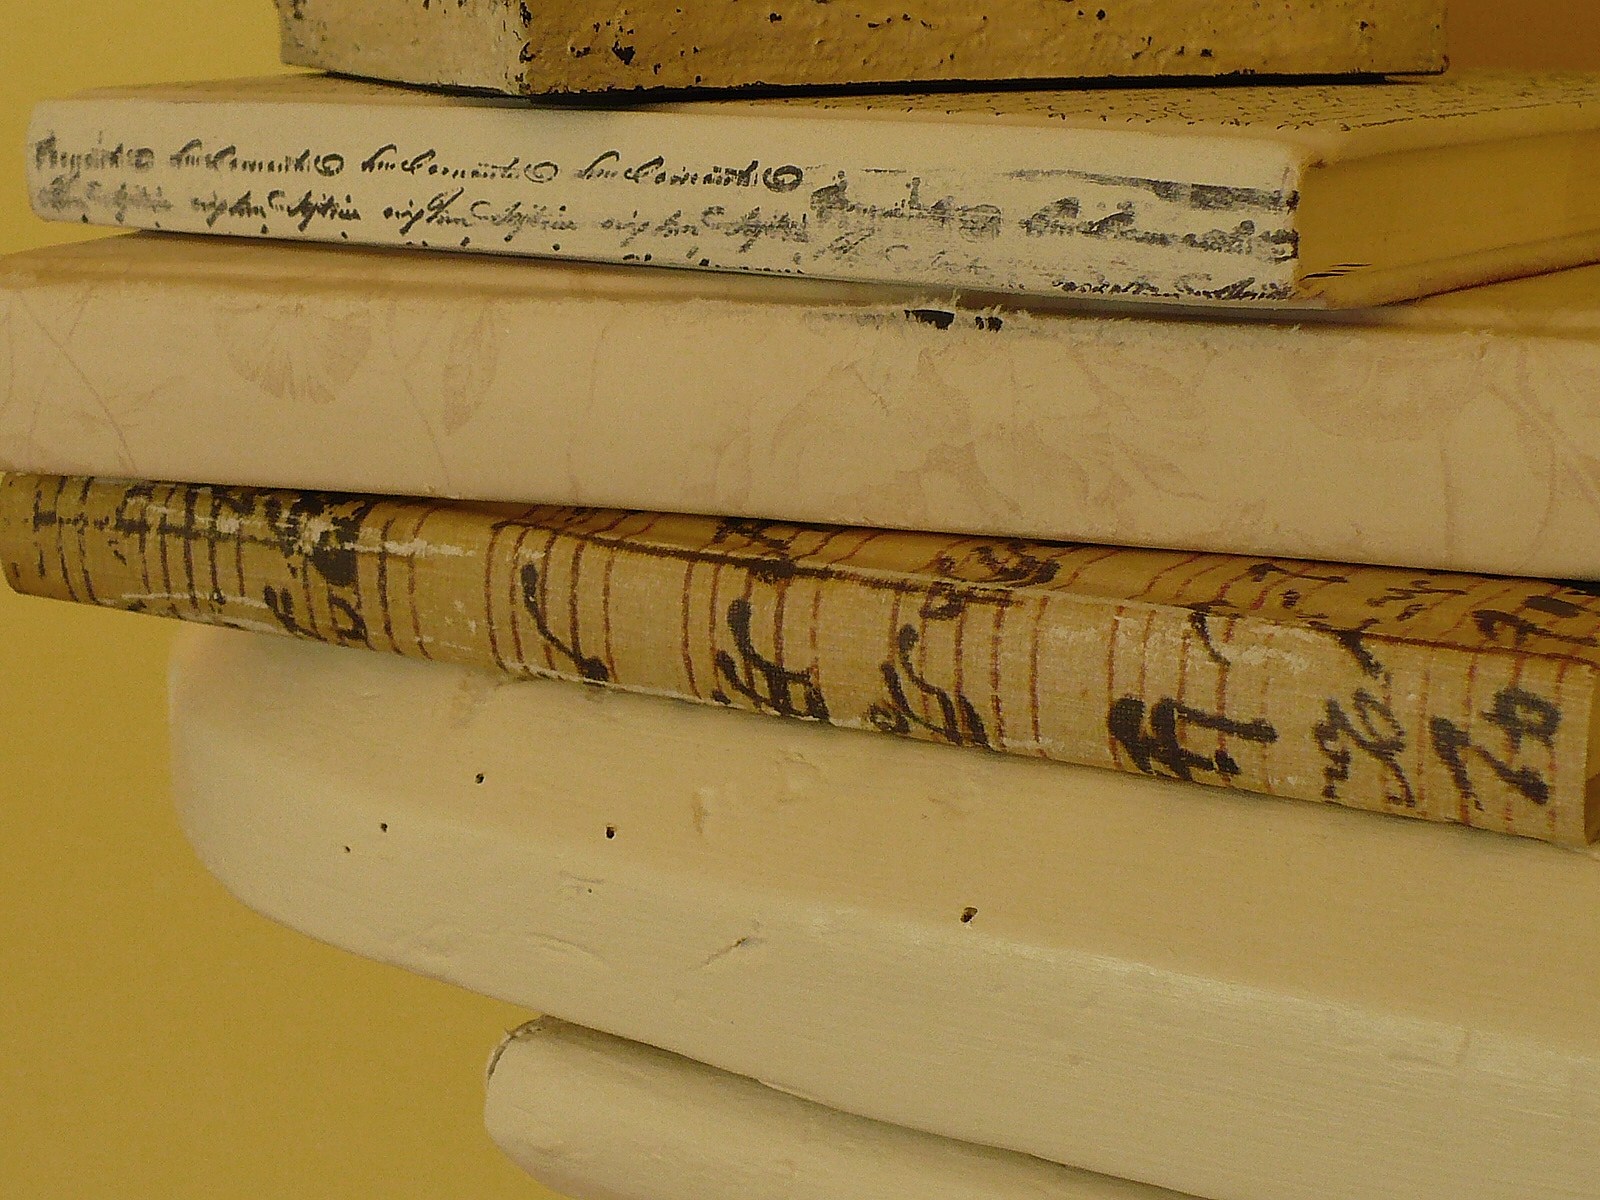
I’ve been looking for some white books to use when decorating and just couldn’t find any. I have yellow books & black books that I use mostly to lift things up, but just couldn’t find any light colored ones. So I decided to make my own. I’ll show you what I did at the end of the post.

But first I want to show you what I did with my mantel to give it a bit of a lighter summery look.

The candleholders with the apple green tapers were ugly brass ones that I got at Goodwill. I few passes of spray paint and some plastic boboches make all the difference don’t you think?

These white iron flowers are from Big Lots last year. I bought them at the end of the season clearance but don’t remember how much I paid for them. The original stickers says $10 so maybe I spent $8? I know most of you savvy shoppers have patience and buy at the end of the season too!

I put a mirror in my faux fireplace last year (I think). I changed out the darker candles that are usually there for some white ones.

The white piece in the center is one I've had for years and years. I've seen that some of you also have it. I took the mirror out and am just using the pretty frame. The mirror I got at Hobby Lobby a while ago but I think they still have it or something like it.

Here’s how I made the French script book. I spray painted an old book with some flat white spray paint.

Then I took a stamp and stamped the front and sides. That’s it! The possibilities are endless and if I had more than the 4 stamps that I have, I would have made more of these. I will be going to Hob Lob next time stamps are on sale and getting a few to use on other books! 

The other books I decoupaged with various things. I used some toile wallpaper on one, some old sheet music on another and some scrapbook paper on others.

Cut your paper to size. If you are doing a rather large book you will need to piece together your paper unless you're using wallpaper/giftwrap.

Apply decopauge medium and the place your paper on top.

 As you can see this piece of scrapbook paper was too short so I had to add a little piece.

That part will be on the bottom and the nice part will be on top.

Above is the top. I also sanded the edges a bit to give it a more worn appearance.

You can use any pattern you want. I'm going to do some books in a black & white harlequin pattern.

They're  great for adding to your displays and very inexpensive to do!

Thanks for spending some time with me today. I hope you try this project and let me know if you do as I'd love to see it! Have a great weekend! OMG it has taken me HOURS to get this thing to post what is wrong with blogger!!!